Master Bedroom Update: Chair Makeover
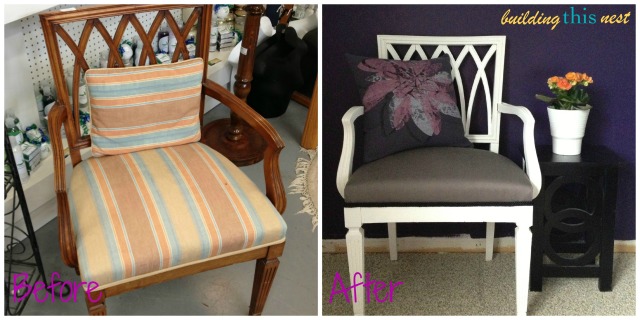 The chair makeover is finished, and I LOVE how it turned out! For anyone who follows me on Facebook or Instagram, I’ve been posting a few sneak peeks over the last few days so that’s always a good way to stay more up to date on what I’m doing between blog posts!
I found this lovely little chair at an antique mall for $25. I was actually really surprised at the price, considering it’s real wood and aside from the arms being just a tiny bit wiggly it’s really solid too. So I scooped it up before I regretted walking away from it! It wasn’t exactly the type of chair I was envisioning for the room, but the price was exactly what I had in mind.
I actually did have a moment where I considered whether I should just leave the wood alone and recover the seat with a nice white fabric. It was a pretty colour of wood, but I knew that it just wouldn’t work in our room since we have no other wood toned things in there, so a wood chair would just look awkward and out of place. So for everyone out there who is against painting wood, please know that I do like the look of unpainted wood furniture but only when it’s in the right space. Did I use the word wood enough times in that paragraph?
So this is what my chair looked like before I got my hands on it (this was taken at the antique mall).
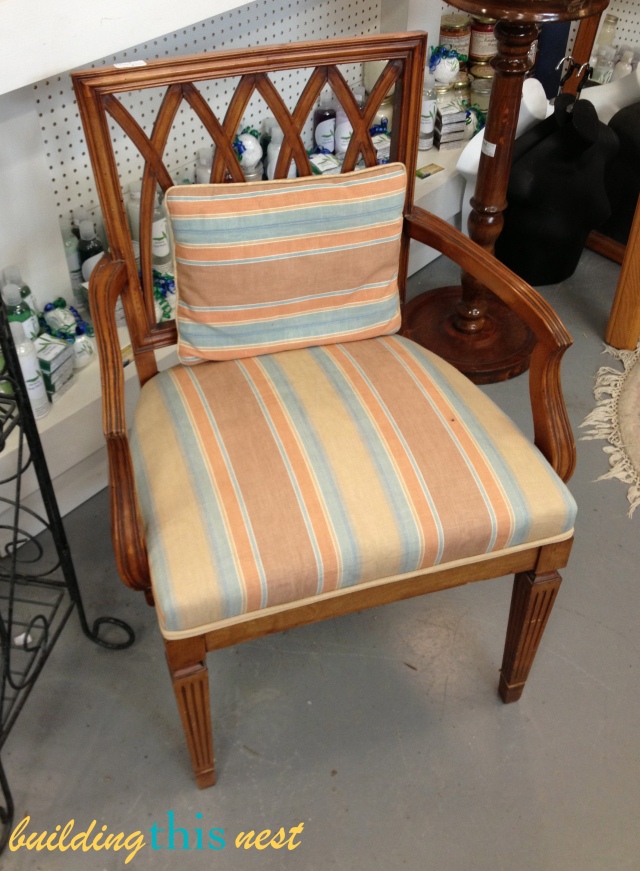 That fabric on the cushion…oh my. So dated and ugly. When I was carrying it out one of the women who worked there asked me if I had those colours in my house and that’s why I bought it. Oh my no lol so I honestly told her that I planned on covering that up haha I thought that weird little pillow in the matching fabric was especially charming….
So I began by sanding the whole thing down. While doing that I discovered that there were several tiny holes all over the entire frame of the chair.
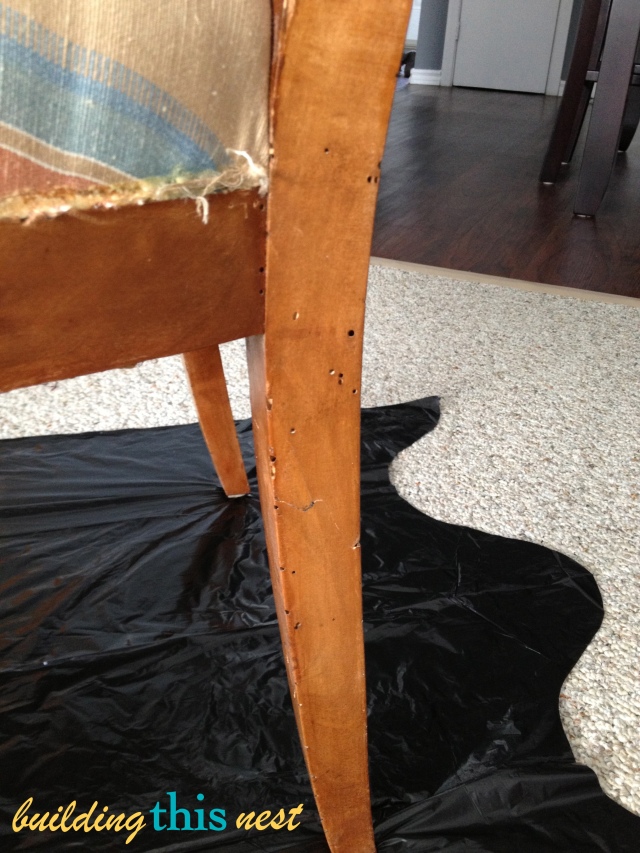 Does anyone know what that’s from? I haven’t looked into it yet, but my guess is that the wood that the chair was made out of had been eaten by bugs back when it was still a tree.
Being thoughtless, I decided that the holes weren’t that bad because honestly I didn’t want to go through the hassle of filling all of those holes so I put a coat of primer on it thinking that I could live with the holes. They add character, right? WRONG.
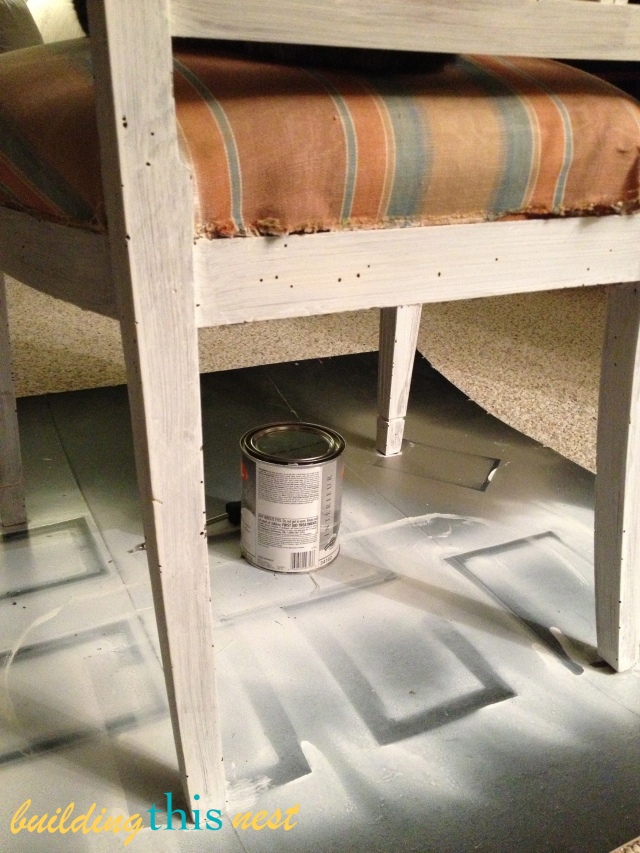 Once I saw the chair white, those little holes looked awful. So I sucked it up and went over the whole thing with wood filler and did my best to fill in all of the teeny tiny holes. Once that dried I sanded it all down again and then put on another coat of primer. Trying to be thrifty, I was going to use the leftover paint from my dresser makeover. However, once I started brushing it on it just wasn’t going on that smoothly. I was using an angled paint brush because of all of the grooves, where a roller just wouldn’t have worked. I wasn’t happy with how that was turning out so I went out and grabbed a can of white satin finish spray paint. We had a really nice morning on Monday, so I took it outside and gave it several light coats. That worked out MUCH better.
Unfortunately there are no pictures of the recovering of the seat because that turned out to not be an exact science. The way the chair was constructed, there was really no way to take the seat off to recover it so I had to just tuck it in around the arms and staple it to the edge.
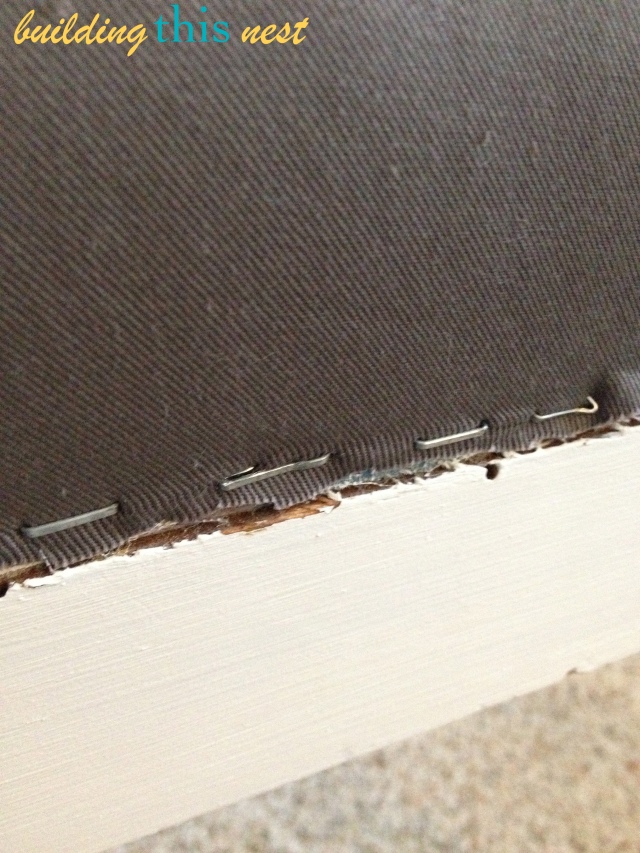 The original upholstery was done that way as well, so it was clear to me that was the only way to do it without completely taking the chair apart which I’m sure would have ruined it.
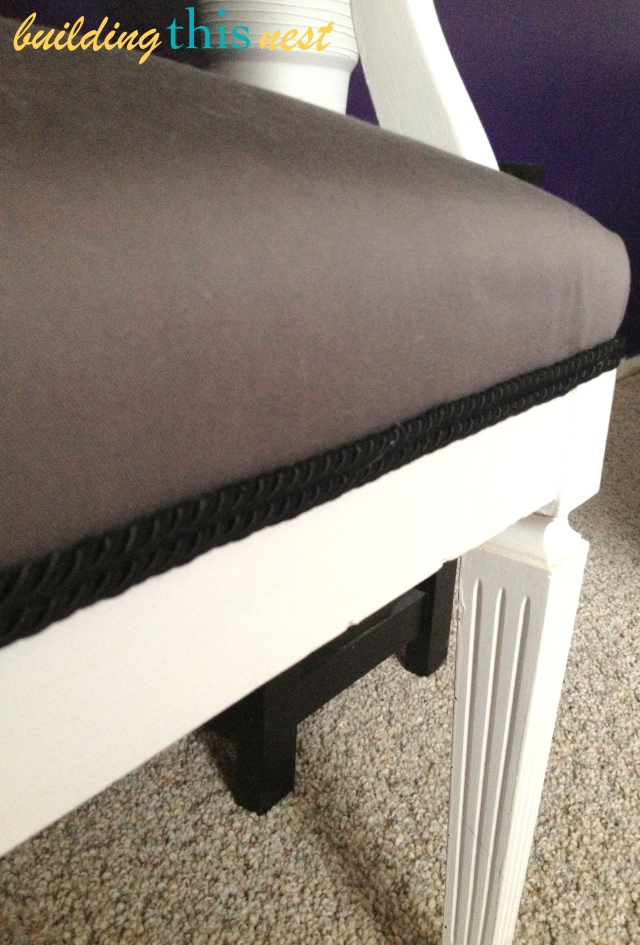
Once I had the seat recovered I needed some trim to hide the ugly staples and raw edges. I picked up some black twisty trim and just hot glued it in place.
The ends were taped to prevent it from unravelling after being cut, so I sealed the ends with a little bit of hot glue to keep it together once I took the tape off.
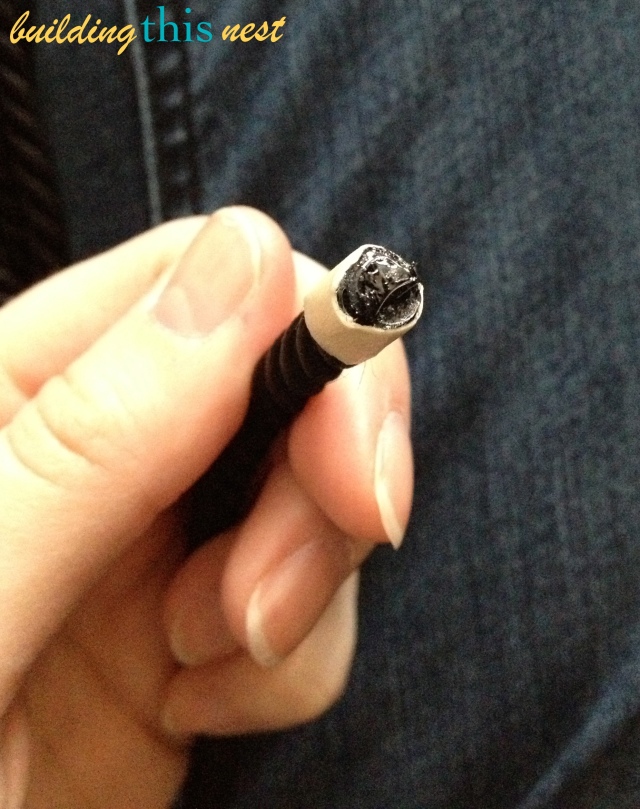 Then I just put the trim up to the chair to figure out the length I needed, used some painters tape to tape off where I was going to cut it and then made a little mark where it needed to be cut to size.
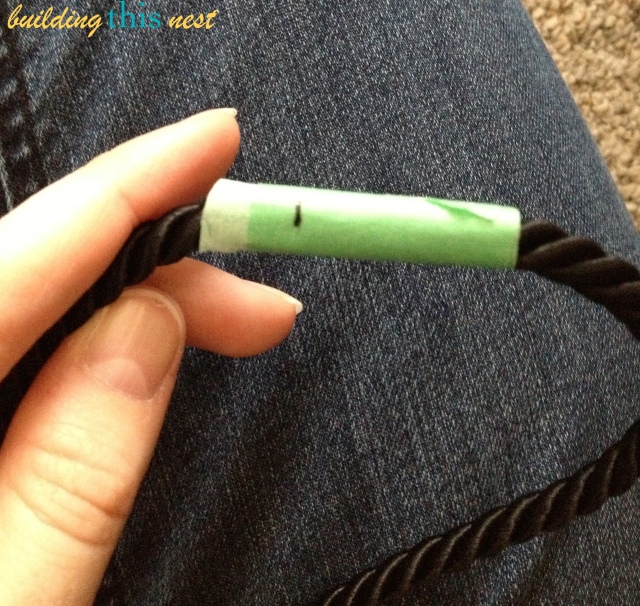 I did a double row of the trim since my staples were up higher than what one row of trim would have covered, and a chunkier trim looked better as well. I did debate doing a fun colour of trim, like a hot pink, but ultimately I decided that something more neutral and classic would be best. I don’t know where this chair may end up down the road and I can add the pop of colour with a bright pillow.
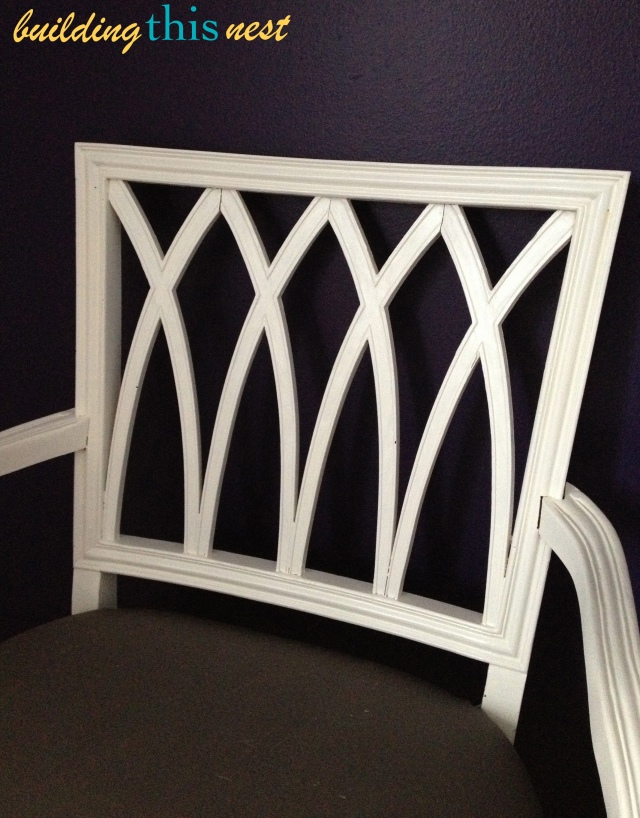
So now, a few beauty shots of our new chair in our room!! (Please disregard the state of the baseboard-less walls. That may not happen until after we move out and it will be easier for my parents to get in and do it when the rooms are all empty.)
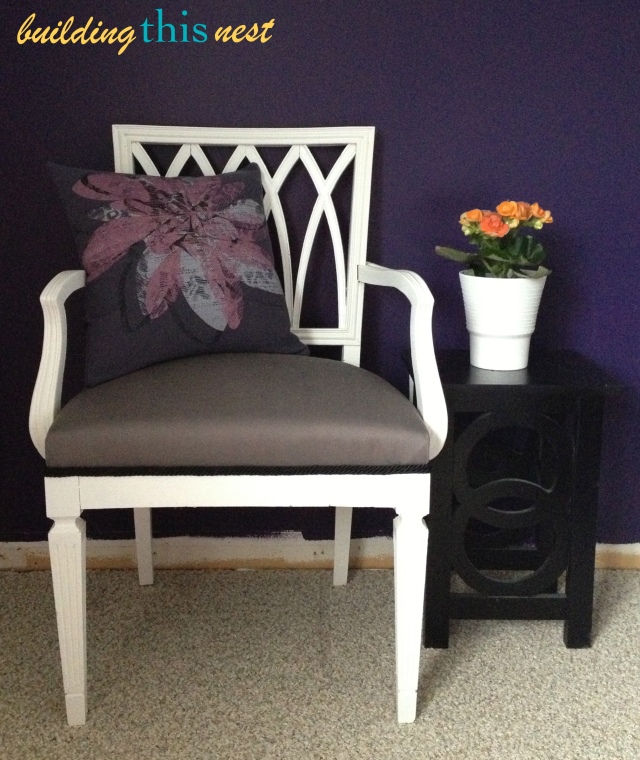 That side table is from the living room and won’t be living there permanently. I also plan on making a different pillow cover that isn’t as dark as that one.
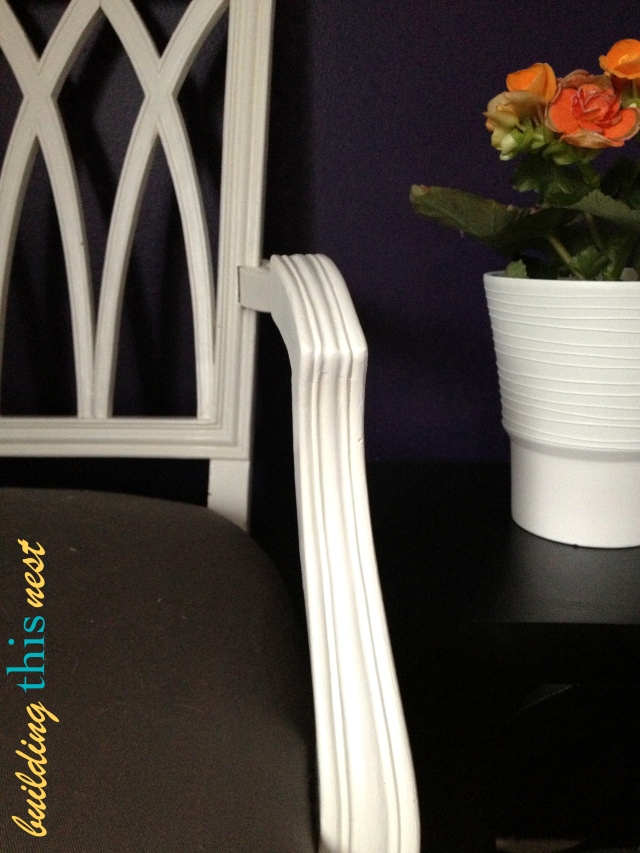 I love all of the curvy details on this chair and I think it looks fantastic in our room. I’m really excited now to keep up the progress of this update. Just to throw it out there, here’s a list of the things that I still want to do in here, as well as what I have already done (the things that are crossed off):
move bed off of purple wall to make room for “reading corner”redo chair for corner- get tall reading lamp for corner
- find and redo side table for corner
- add some definition to white headboard so that it stands out more from light coloured wall (either recover it or add nail head detail around edges)
- add some colour to the inside of the ceiling shade
rehang the curtains (go high and wide instead of right on top of the window trim)- add sheer curtains to the windows (this idea is what I’m thinking)
- patch and paint holes in purple wall
- possibly add stencil to purple wall
- add picture ledges to purple wall
- frame pictures/prints for picture ledges
- colourful accent pillows for bed
- new pillow cover for chair pillow
Clearly I still have lots of things I want to do in there, but I’m going to have to space it out to make it more budget friendly. Overall I just want to create a more layered looking space and add a bit more colour. I’ll definitely be sharing updates as they happen!
And just because I felt like sharing (and because this post is already super long haha) here are a few pictures I took at the antique mall while I was there.
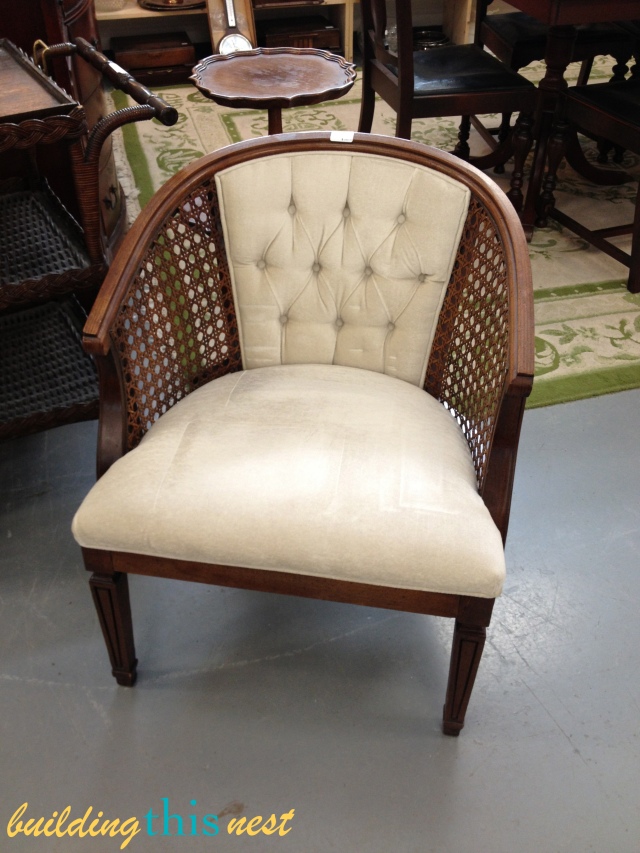 This was the style of chair that I ideally would have wanted for the room. It was in really good shape, although the seat wasn’t totally comfy, but with a $100 price tag there was no way it was coming home with me.
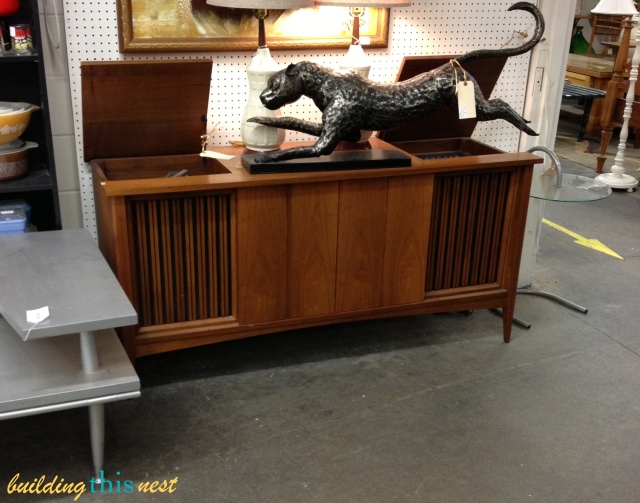 This was a fun little piece that I thought would be great as an entertainment unit of sorts to put your TV on, or as a buffet in a dining room. It actually had a record player on one side of the top and the controls on the other side (where you can see the panels lifted up). It had a very mid century modern vibe to me which seems to be all the rage in design right now.
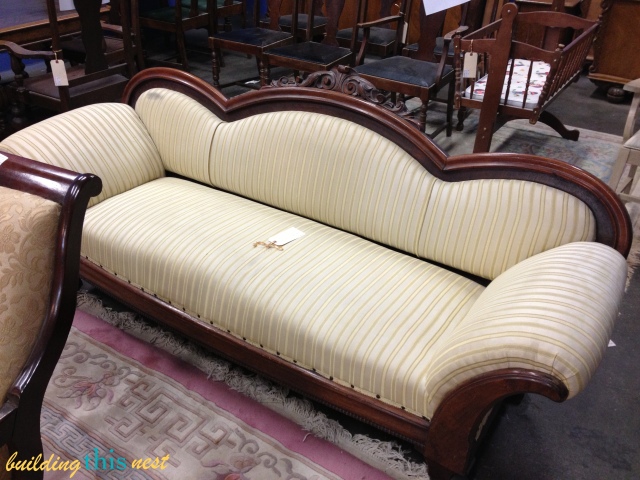 And call me crazy but I thought there was something neat about this sofa. If the wooden trim were painted a fun colour and it was reupholstered in white or a light grey, I think it would be pretty cool. I also thought the wooden cradle behind it was neat, but it was pretty wobbly so it would have needed lots of love before being baby safe.
This place has lots of neat finds and I can see myself getting some pieces there when we get a house and have a bit of a budget for new furniture and decorating.
Does anyone else have a favourite spot for fun finds?
Linking to: Serenity Now
Comments
9 Responses to “Master Bedroom Update: Chair Makeover”Trackbacks
Check out what others are saying...-
[…] ← Master Bedroom Update: Chair Makeover […]
-
[…] Master Bedroom Update: Chair Makeover (buildingthisnest.wordpress.com) […]
-
[…] shared a few of the projects along the way like my chair makeover, changing the curtains a bit and some other updates, some butterfly shadowbox art and my DIY […]
-
[…] I came across yesterday while browsing a lovely antique mall. It’s the same place that I got my chair I made over for my master bedroom and there are always so many fun and beautiful things there. I love when other bloggers post about […]


Love your chair project, Steph! If you’re ever this way between May-October, the Aberfoyle Antique market happens every Sunday (outdoors). I’ve found a few great finds there. What is the name of the antique mall that you visited?
Thanks Dana! I’ll definitely keep that in mind if I’m in that area this summer. I love looking through antique places and thrift stores to find little hidden treasures! The one I like here is called Brydges Street Merchant Market. It’s really big and they have all kinds of stuff! Some of it is pretty pricey, but there are definitely reasonable finds too!
Reblogged this on DIY projects.
Thanks :)
I love a good furniture makeover! This chair has such great lines! Gorgeous! Thanks for linking up to the “Get Your DIY On” link up party! Bring your chalkboard crafts Sunday at 7! :)